

Step 1 — Open Connectors and add a custom connector
In Claude, open Settings → Connectors. Click Add, then choose Add custom connector.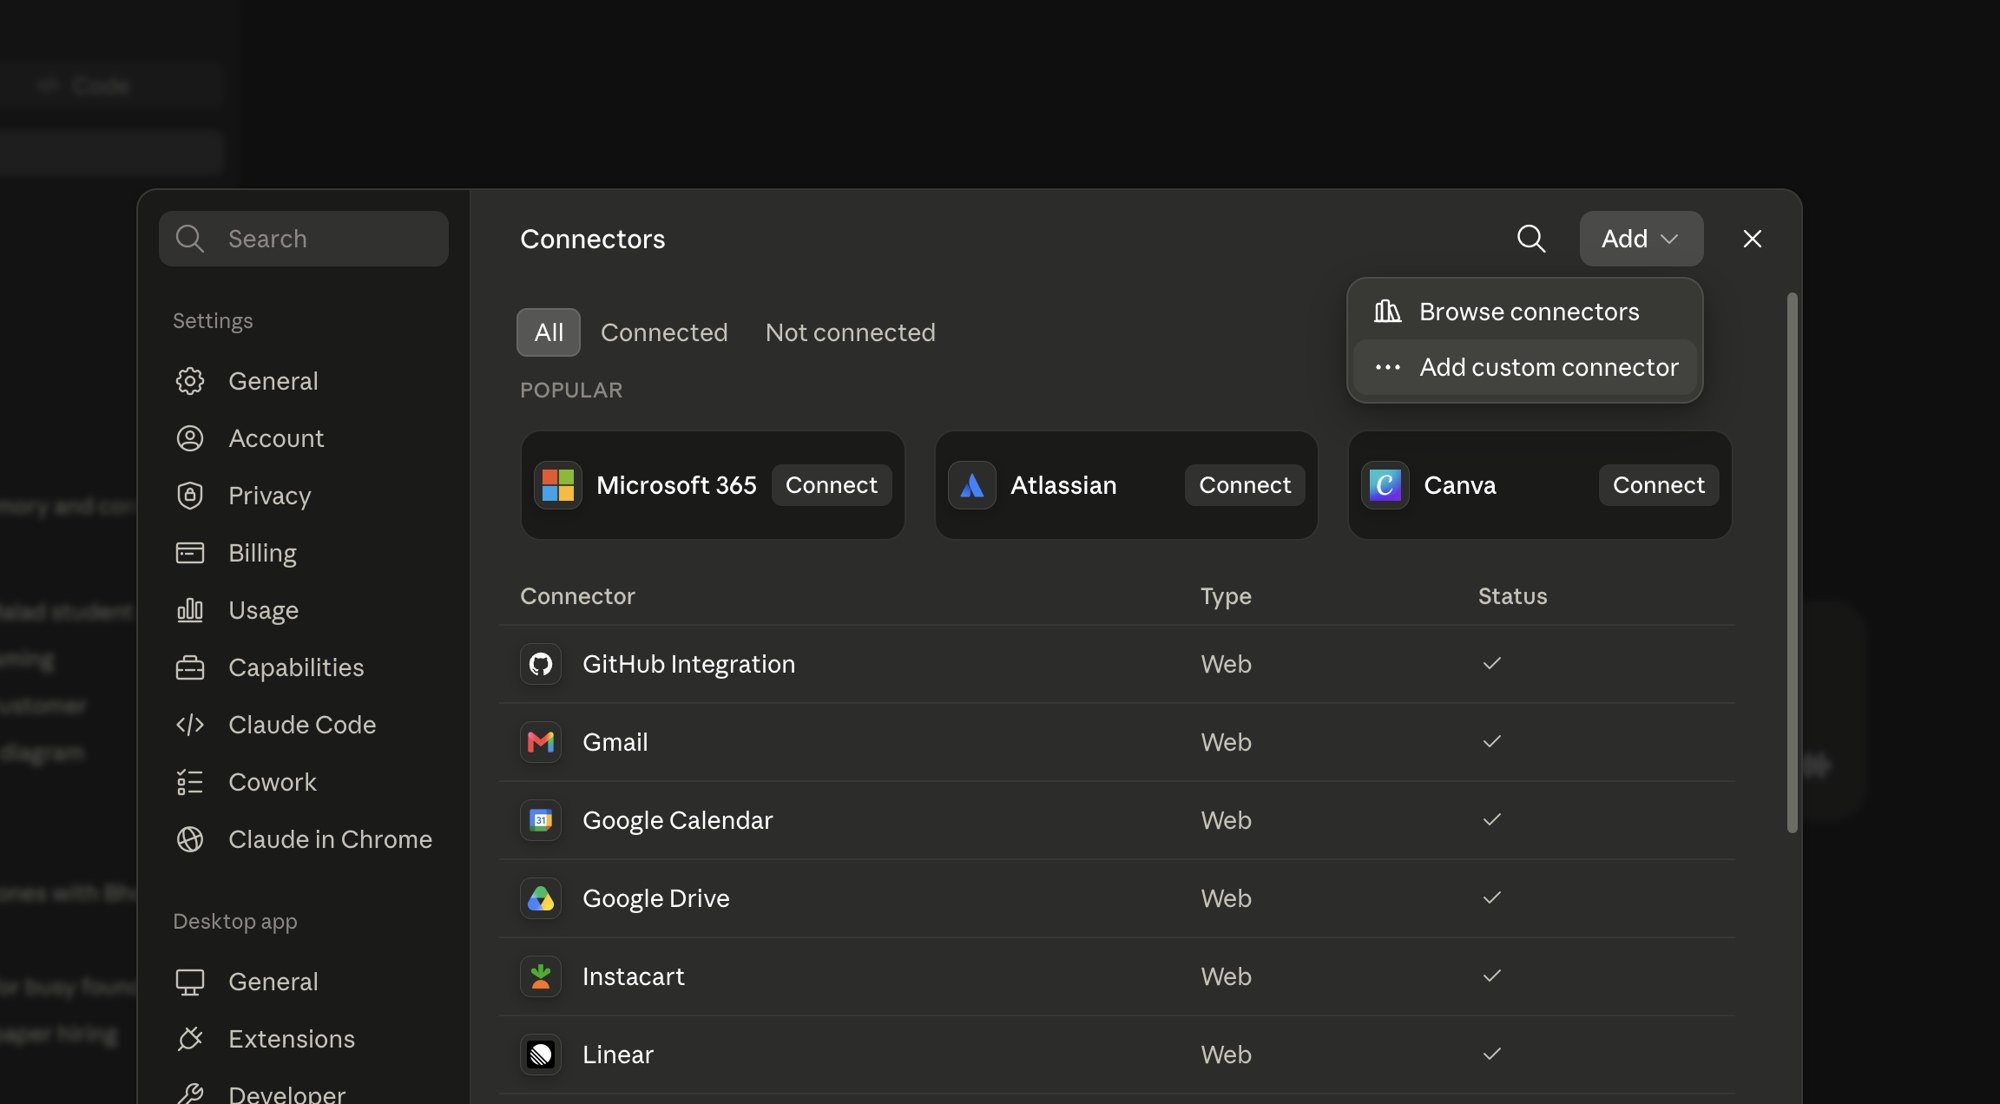
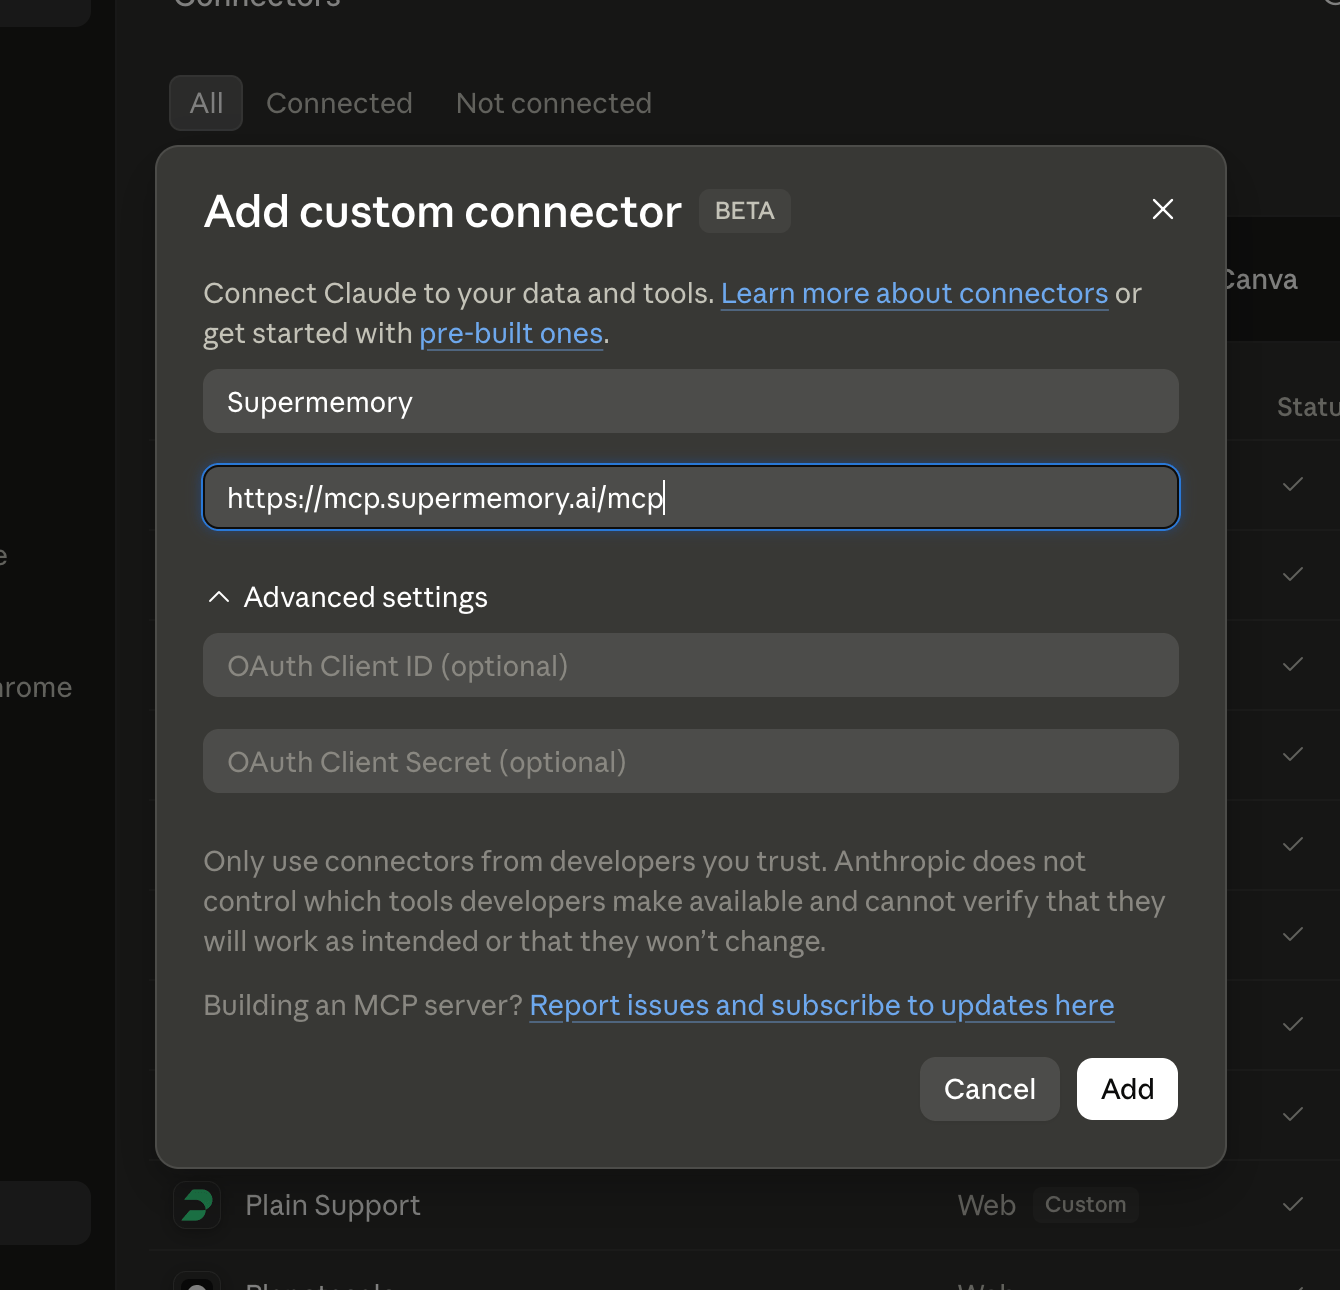
Step 2 — Enter name and remote MCP URL
In the Add custom connector dialog:
Leave OAuth Client ID and OAuth Client Secret empty unless you have custom OAuth credentials. Click Add.
Step 3 — Connect
Supermemory appears under your connectors. Click Connect.
Step 4 — Authorize
You’ll be redirected to Supermemory to sign in and choose access scopes (for example Read + Write or Full access). Select the scopes you want, then click Authorize.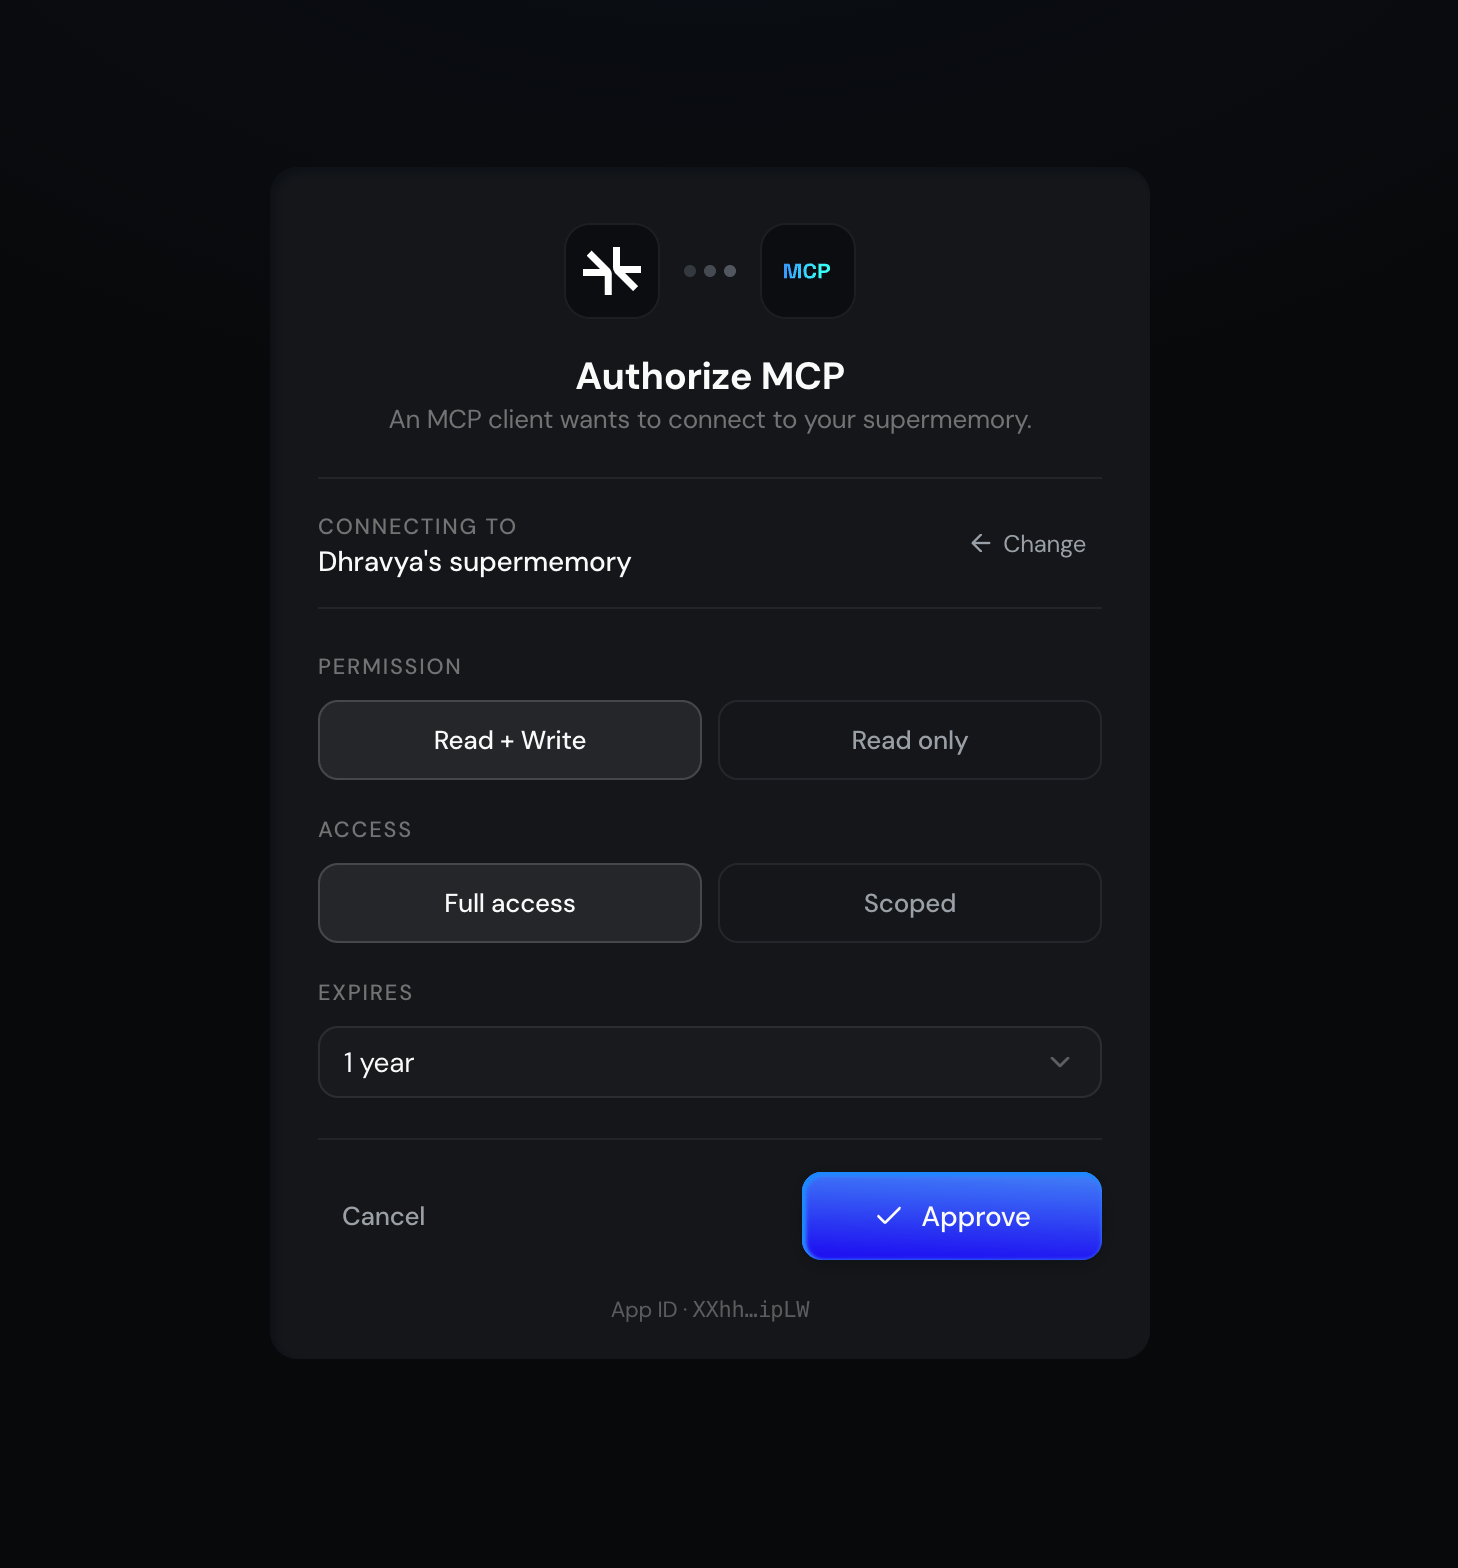
Done
Supermemory is connected and ready to use in Claude. You can change or revoke access later from Settings → Connectors.See also: Overview · Setup and Usage